
Making a panel gauge
I have several marking gauges, but I never needed anything wider than about 6″. Until I designed and made our under-stairs shoe cabinet, that is. So instead of going out and buying one, I decided on making a panel gauge out of scraps from my scrap bin.
Oh, and just to make it interesting, I decided to make it entirely with hand tools.
Making the beam
I had a nice, straight-grained stick of cherry, which I thought may make a nice beam for the gauge, so I squared it up and drilled a hole to take a pencil.

It never ceases to amaze me how wonderful hand tools are, and what a super job they make. In the photo below you can see the hole I just drilled with a brace and bit.
You can also see a wedge, in the background, made from a scrap of hard maple. It will wedge the beam into the headstock.

Making the headstock
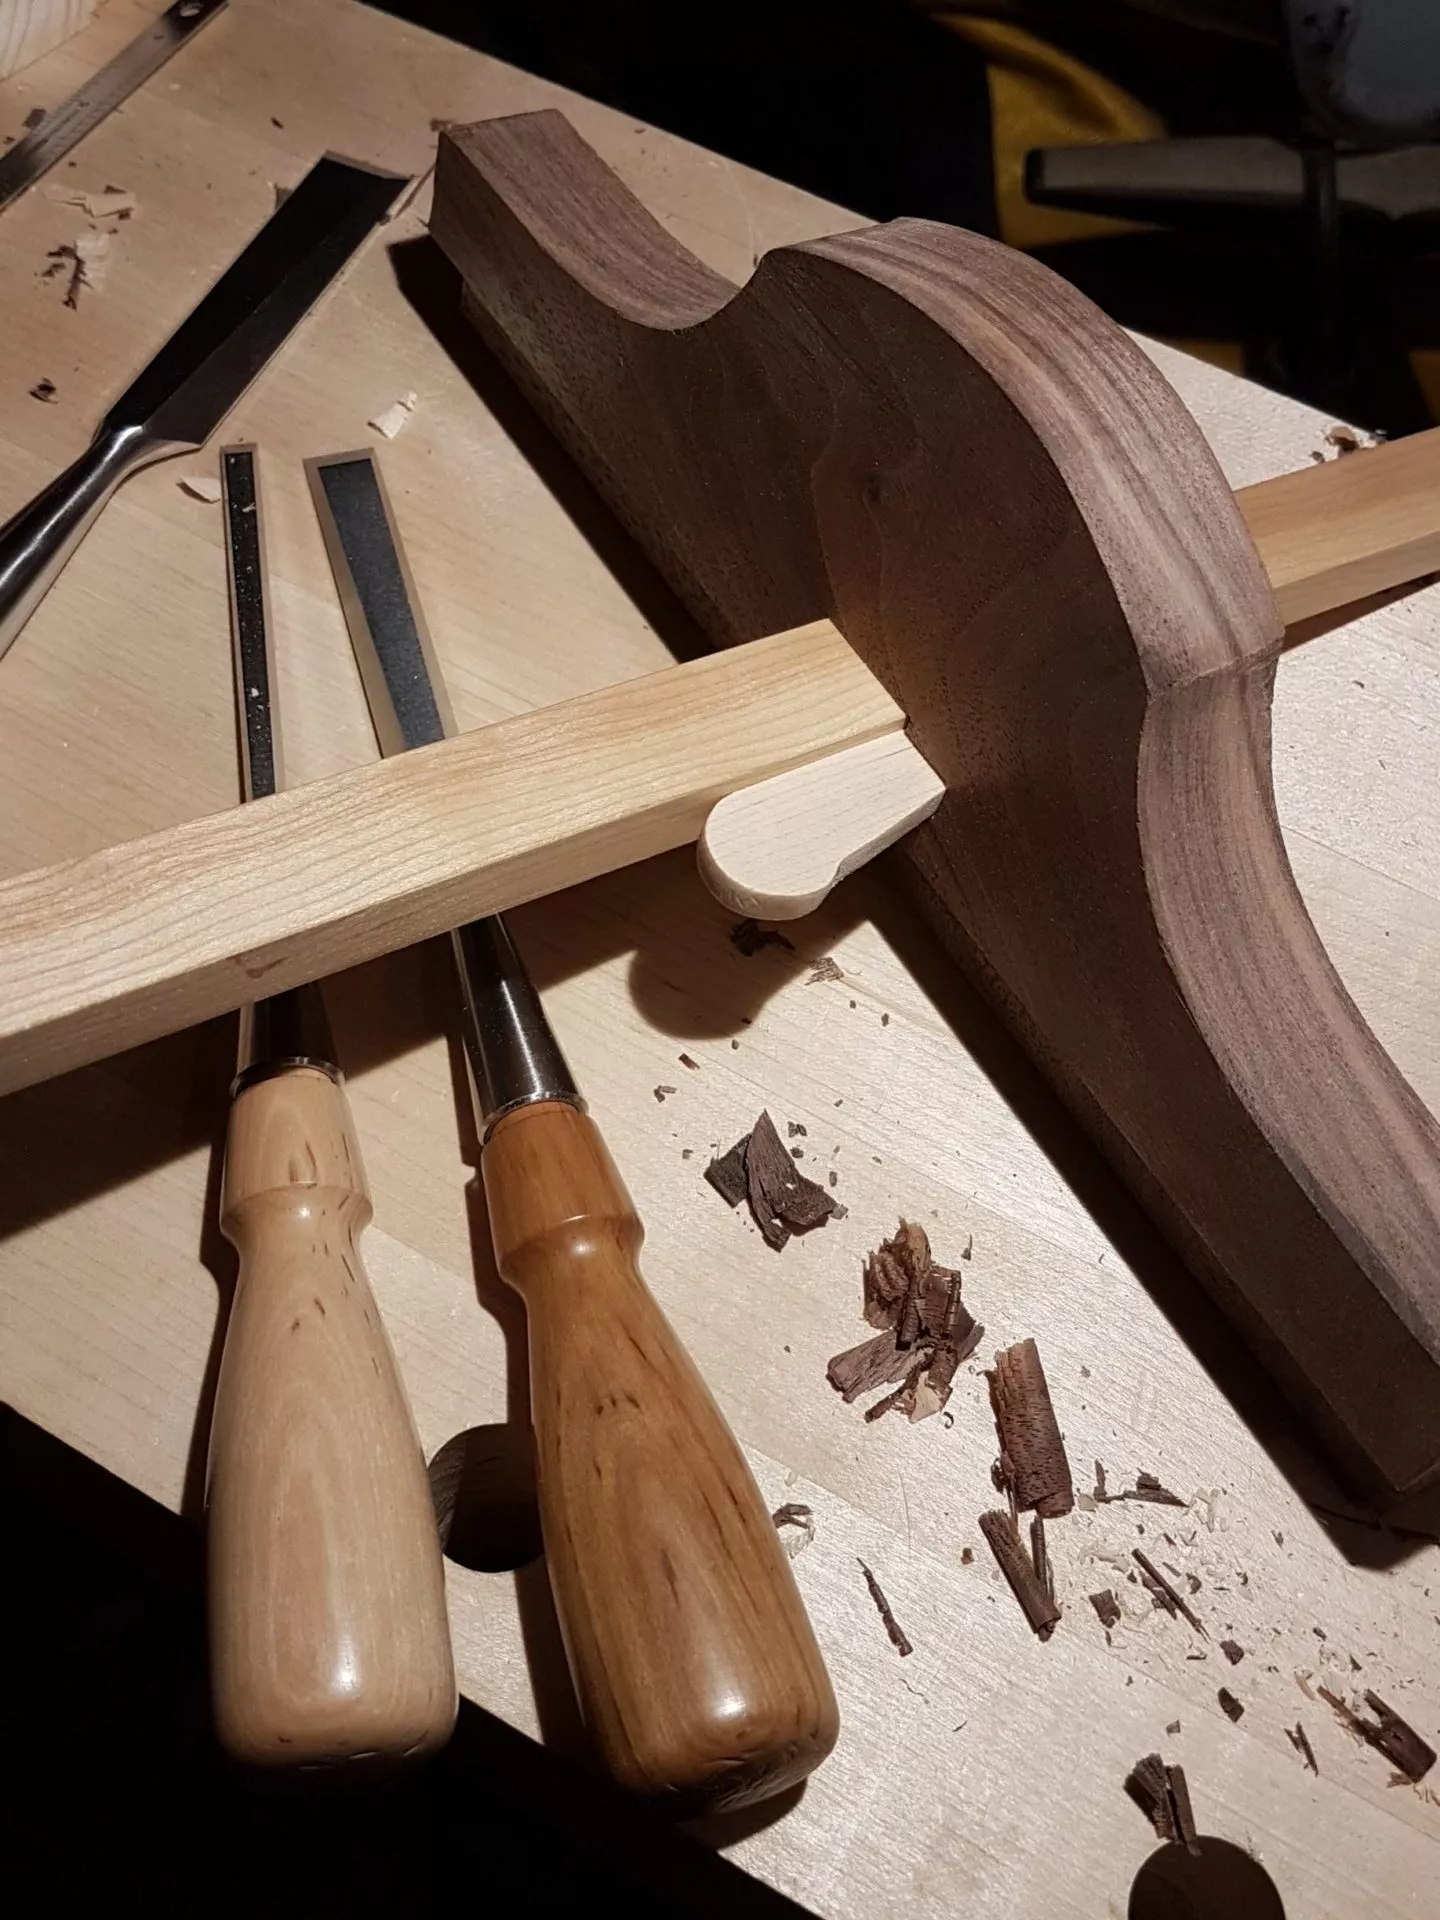
Once I’d made the beam, I then roughed out the shape of the headstock and marked up the location of the mortise for the beam to go through the headstock.
Roughing out the shape of the headstock was hard work. I don’t use a round bottom spokeshave much, but that was the only way I had to get those curves in the black walnut headstock.

I chiselled out a rectangular mortise for the beam. It’s a fairly tight fit, but not so tight that the beam can’t slide freely. I then cut a ramp for the wedge. It needed to be at the same angle as the wedge, to give an even pressure against the beam.
The angle between the far edge of the mortise and the face of the headstock is exactly at right-angles. That way, when the wedge is knocked in, it puts pressure against the beam and locks it in place and holds it square.
Putting it all together
The next task was to cut a ramp for the pencil wedge. The wedge is a bit too long, by the time it’s wedged the pencil is sticking out further than it. Easily fixed, as it’s made of wood too.

Finally, just a little more shaping of the headstock to take off the sharp edges. Finishing off with several coats of danish oil.

Future enhancement
One enhancement, I will make, is to add a second mortise and wedge ramp in the other end of the beam. This time, to take a marking knife blade. Then I can pull the beam out and flip it around, giving me a panel cutting gauge.
The beam is about 24” (600mm) long, and the headstock is about 10” (250mm) long. I measured none of the dimensions to make this panel gauge, as it’s unnecessary.

Grant Crawley
By profession I'm a computer engineer, but by passion I'm a designer and maker of handcrafted objects. I use whatever materials make sense for the item or project I'm working on, whether that's wood, fabric, leather, metals or plastics.


