
Designing a woodworking workbench
In 2003 I came to the conclusion that I really need a proper woodworking workbench. But, I didn’t want to buy a ready-made one. I wanted one that would be exactly what I wanted. So I set about designing a woodworking workbench that was perfect for my needs and the space I have available.
I decided on some basic criteria, like size, vice layout and work-holding. Then life happened. Although I had bought a ton of material to make the bench, I didn’t get started for some considerable time.
I have a portable workbench, but it is too small to be useful for projects of any significant size.
Fast forward to 2016 and I started watching some videos about workbenches on YouTube. None of them really worked for me, but I did get some ideas.
My design criteria
- The top must be thick, flat and stable.
- There needs to be a row of 3/4″ round dog holes close to the front edge.
- There needs to be additional dog holes to assist with assembly operations and work-holding.
- There must be a front or face vice on the left.
- There should be a tail vice, wagon vice, or similar.
- There should be work-holding dog holes on the front faces.
- The legs must be flush with the front face of the apron to aid with clamping.
- Length can’t be over 6′.
- Depth shouldn’t be over 30″
- There needs to be a tool well.
- The distance between the tool well and the front face of the apron needs to allow for clamping workpieces with 24″ clamps.
- It must be monumentally heavy so it doesn’t move.
- The base must not rack.
- There should be hand-tool storage drawers underneath.
- Layout tools and chisels should be stored in removable trays.
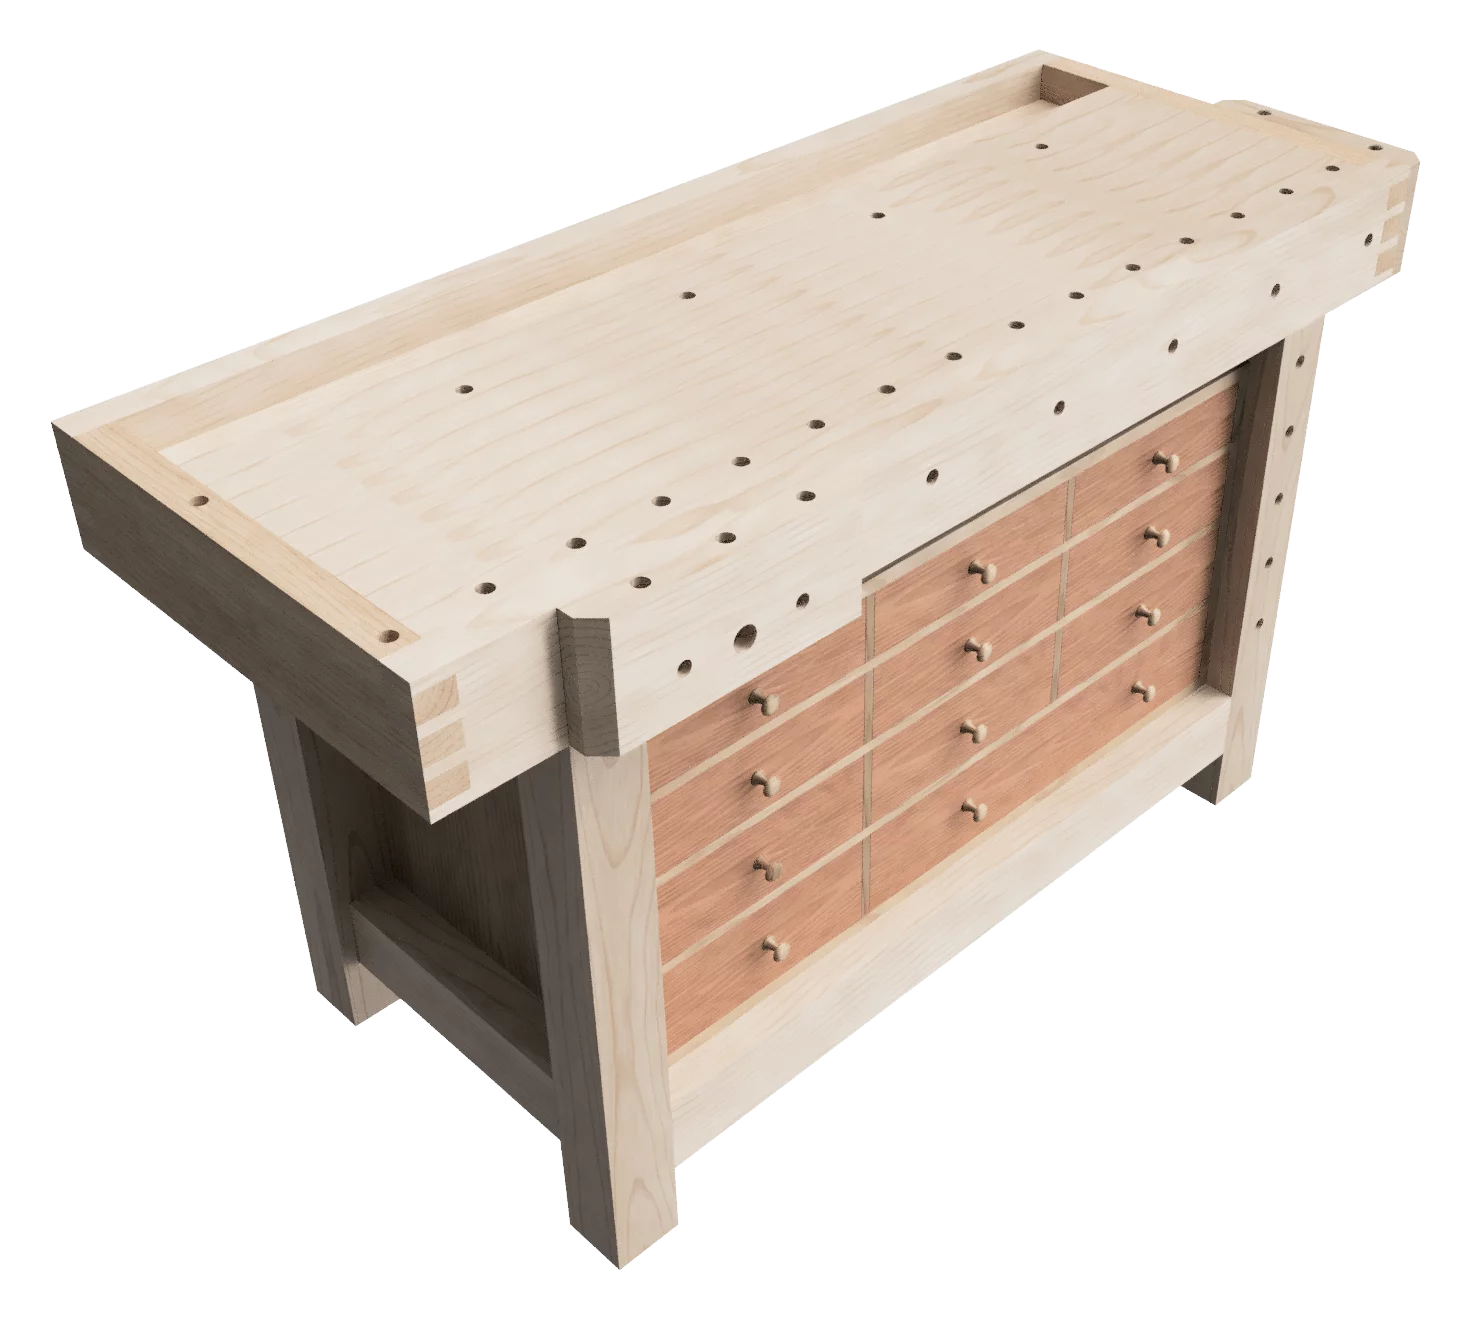
What I came up with
I like hard maple as a wood; I love working with it. Luckily, hard maple is renowned for making great workbenches. I bought a load of 8/4 hard maple boards years ago, for this project, and I have stored them in a relatively dry garage ever since.
With hard maple in mind, I’d made several sketches over the years. Over that time I got some basic CAD drawings done in Draftsight. But, it wasn’t until I got Autodesk Fusion 360 that I could really flesh out the design and visualise how it may look and fit together.

Early designs were with a leg vice, but having read many articles about vices I decided that a leg vice wasn’t for me. I love the look of them, I just don’t think they’re right for the work I do and want to do.
I even went as far as designing a mechanism to keep the leg vice parallel with the leg.
Designing the hand-tool storage
When designing a woodworking workbench it’s not all about the worktop, I also need some storage for my hand tools. Currently, they’re all over the workshop in boxes or just lying around.
I’m on version 5 of the hand-tool storage drawers, but it’s not exactly how I want them.
I might split the top row of drawers into two. Although I may just put the layout tool trays I want inside, resting on a rebate (rabbet) in the drawer sides.
The long, double-width drawer at the bottom is to house a #7 plane and a shooting plane.
I have designed the drawer box to be removable from the base, once the drawers are out it should be light enough to lift up 1/2″ and then slide it forward and out of the base.
Another reason for ditching the leg vice, as it would prevent the left drawers from opening, or I would have to make them smaller and use the space for something else. However, with this design I can keep the drawers, and still have a good face vice.
There is about 5″ between the top of the drawer box and the underside of the top. It should be enough to allow the use of a holdfast, and maybe also allow for storage of some clamps, or possibly my shooting board.
A sturdy base
This is a forever bench, so the last thing I want is any racking. I still have a design choice to make on the base, and that’s whether to add another stretcher across the back, near the top. So I’m still designing my woodworking workbench.

The tops of the legs slot into rebates (rabbets) in the front and rear aprons. I ideally want the top to be removable, but it’s also a structural component. I have toyed with the idea of tapering the rebates so that gravity helps to keep it firmly seated.

Seasonal expansion and contraction of the worktop get absorbed by the tool-well, which has a loose base. Other than the front apron, the top layers are floating in long grooves in the apron end caps.
All the joints in the base are draw-bored mortice and tenon joints. They’re deep, but not through tenons.
Construction progress
After designing a woodworking workbench, you need some way of making it. Without a workbench, making a workbench is difficult. I have a cheap old workmate knock-off, which I replaced the MDF jaws on, but it’s not adequate for this job.
It’s like the old chicken and egg conundrum. Seems strange, but you need to start with the top. Because you need the top to make the other parts, more than you need the other parts to make the top.
I started by making the top in sections. I only had a 6″ benchtop planer (jointer if you’re American) when I started construction. Which, for over 60″ long, 6″ wide and 2″ thick pieces of hard maple, is no mean feat.

I glued up the first section of the workbench top (that’s the first three laminations). I then had to drill the row of 3/4″ dog holes. Starting by flattening the top. I picked a 4″ dog hole spacing because that’s what seems to work for me.

After glueing up section-2, this time using biscuits to align the top surface better, I had to glue section-1 to section-2. Again; I used biscuits to help with alignment. The biscuits help a lot, especially when you don’t have a flat reference surface.

If you’re interested in plans for my workbench, please contact me and I’ll create them.
Grant Crawley
By profession I'm a computer engineer, but by passion I'm a designer and maker of handcrafted objects. I use whatever materials make sense for the item or project I'm working on, whether that's wood, fabric, leather, metals or plastics.


